
GET ORGANIZED WITH THIS DIY ANIMAL KEY HOLDER!

If you’re anything like me, you forget where you placed your keys at least once a week, and you can never find them when you’re in a rush. Well, I made a cute, cheap, and super easy animal key holder so I'll never lose my keys again! I purchased most of the materials from the $1 store. Here's what you'll need to get started.

Materials:
- Pictures frame 5in. x 7in.
- 3 Plastic toy animals
- Spray paint
- Epoxy glue
- D-ring hooks (medium or small will both work)
- Nail
Tools:
- X-acto Knife
- Toothpick or Popsicle stick
- Hammer
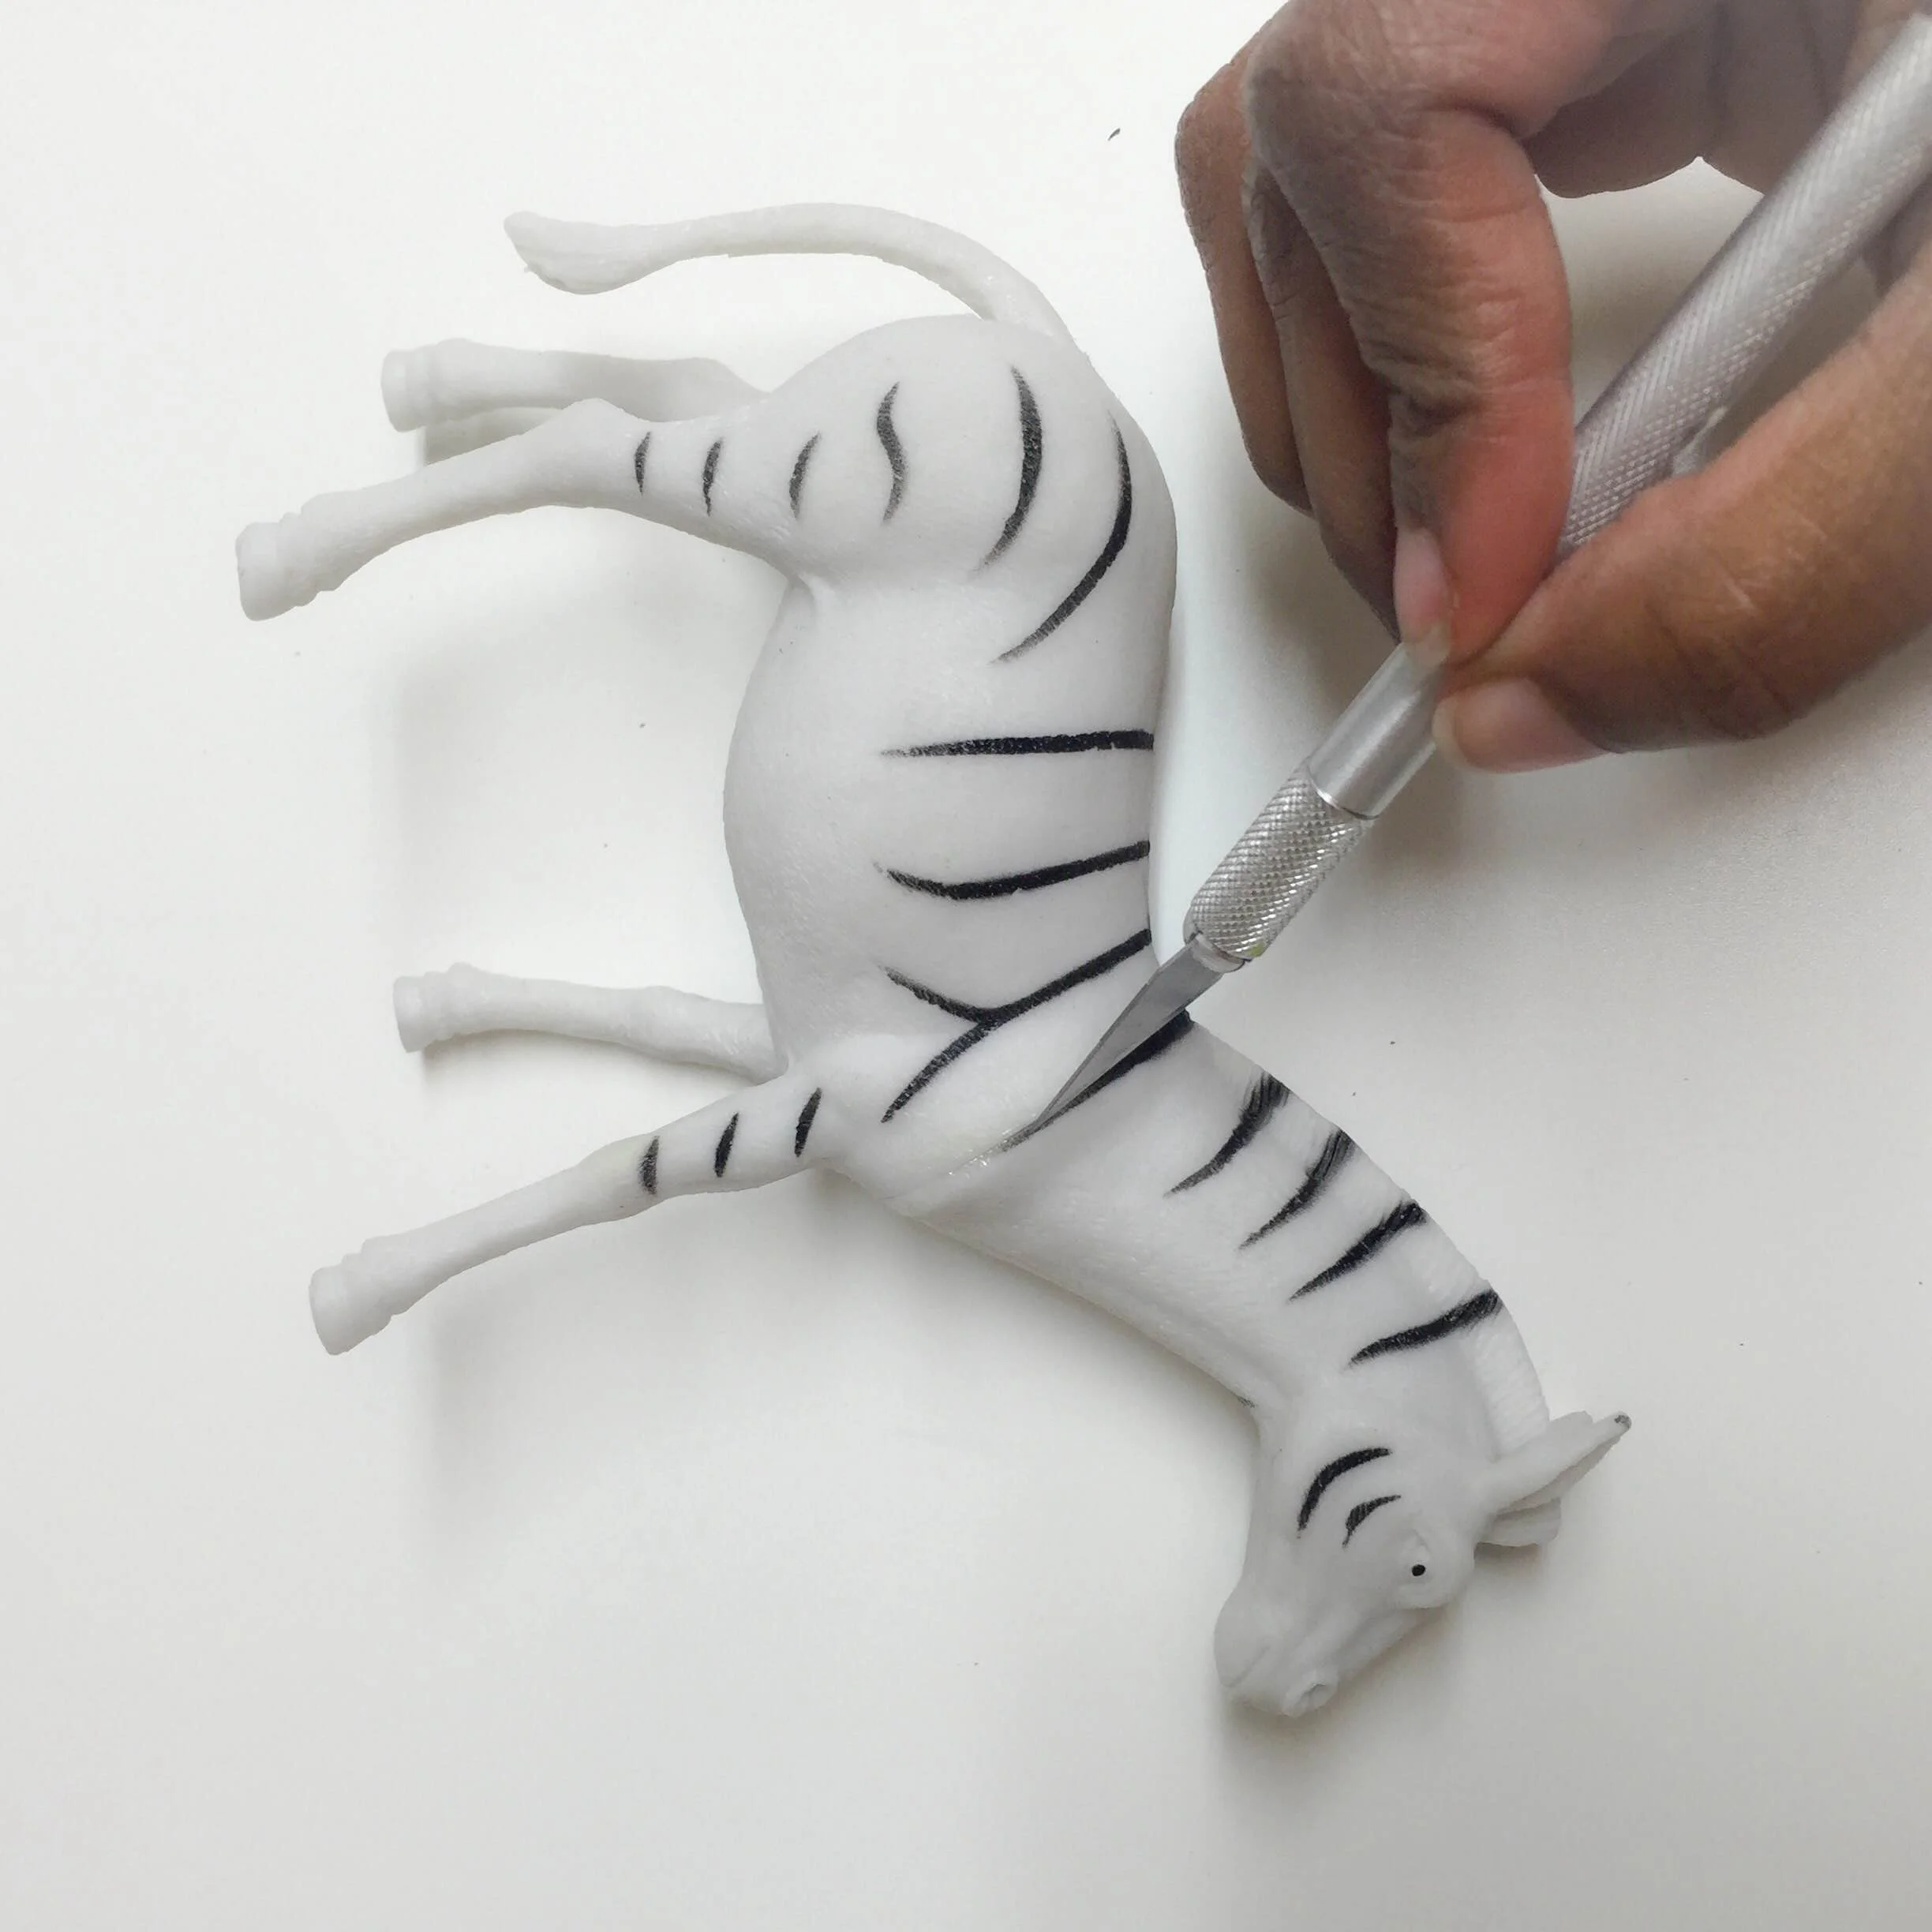
Step 1: Use the X-acto knife to cut the neck of the toy from the body. You want a good amount of the neck intact to have space between the head and the cardboard for the glue to hold. If there is a seam line connecting the neck to the body use that as a guide to cut. If not, draw a line (in pencil) around the neck and use that as a guide.
Step 2: Remove the glass from the picture frame and leave the cardboard backing in the picture frame. Decide where you want to place the animals on the cardboard and mark.
Step 3: Mix the epoxy glue according to the directions. Use the toothpick or Popsicle stick to mix the epoxy glue. Place a small amount on the D-ring, and glue it to the back of the picture frame.
Step 4: Continue using the epoxy glue to apply it to the base of the neck on the toy animal that you want in the center of the frame. After you’ve put a good amount of glue on the base of the neck stick it on the cardboard. Repeat with the other two animals. Ensure that you are doing one at a time as the epoxy glue hardens fast. You want to place the other two animals to the right and left of the centered one. Let this dry for about 30mins.
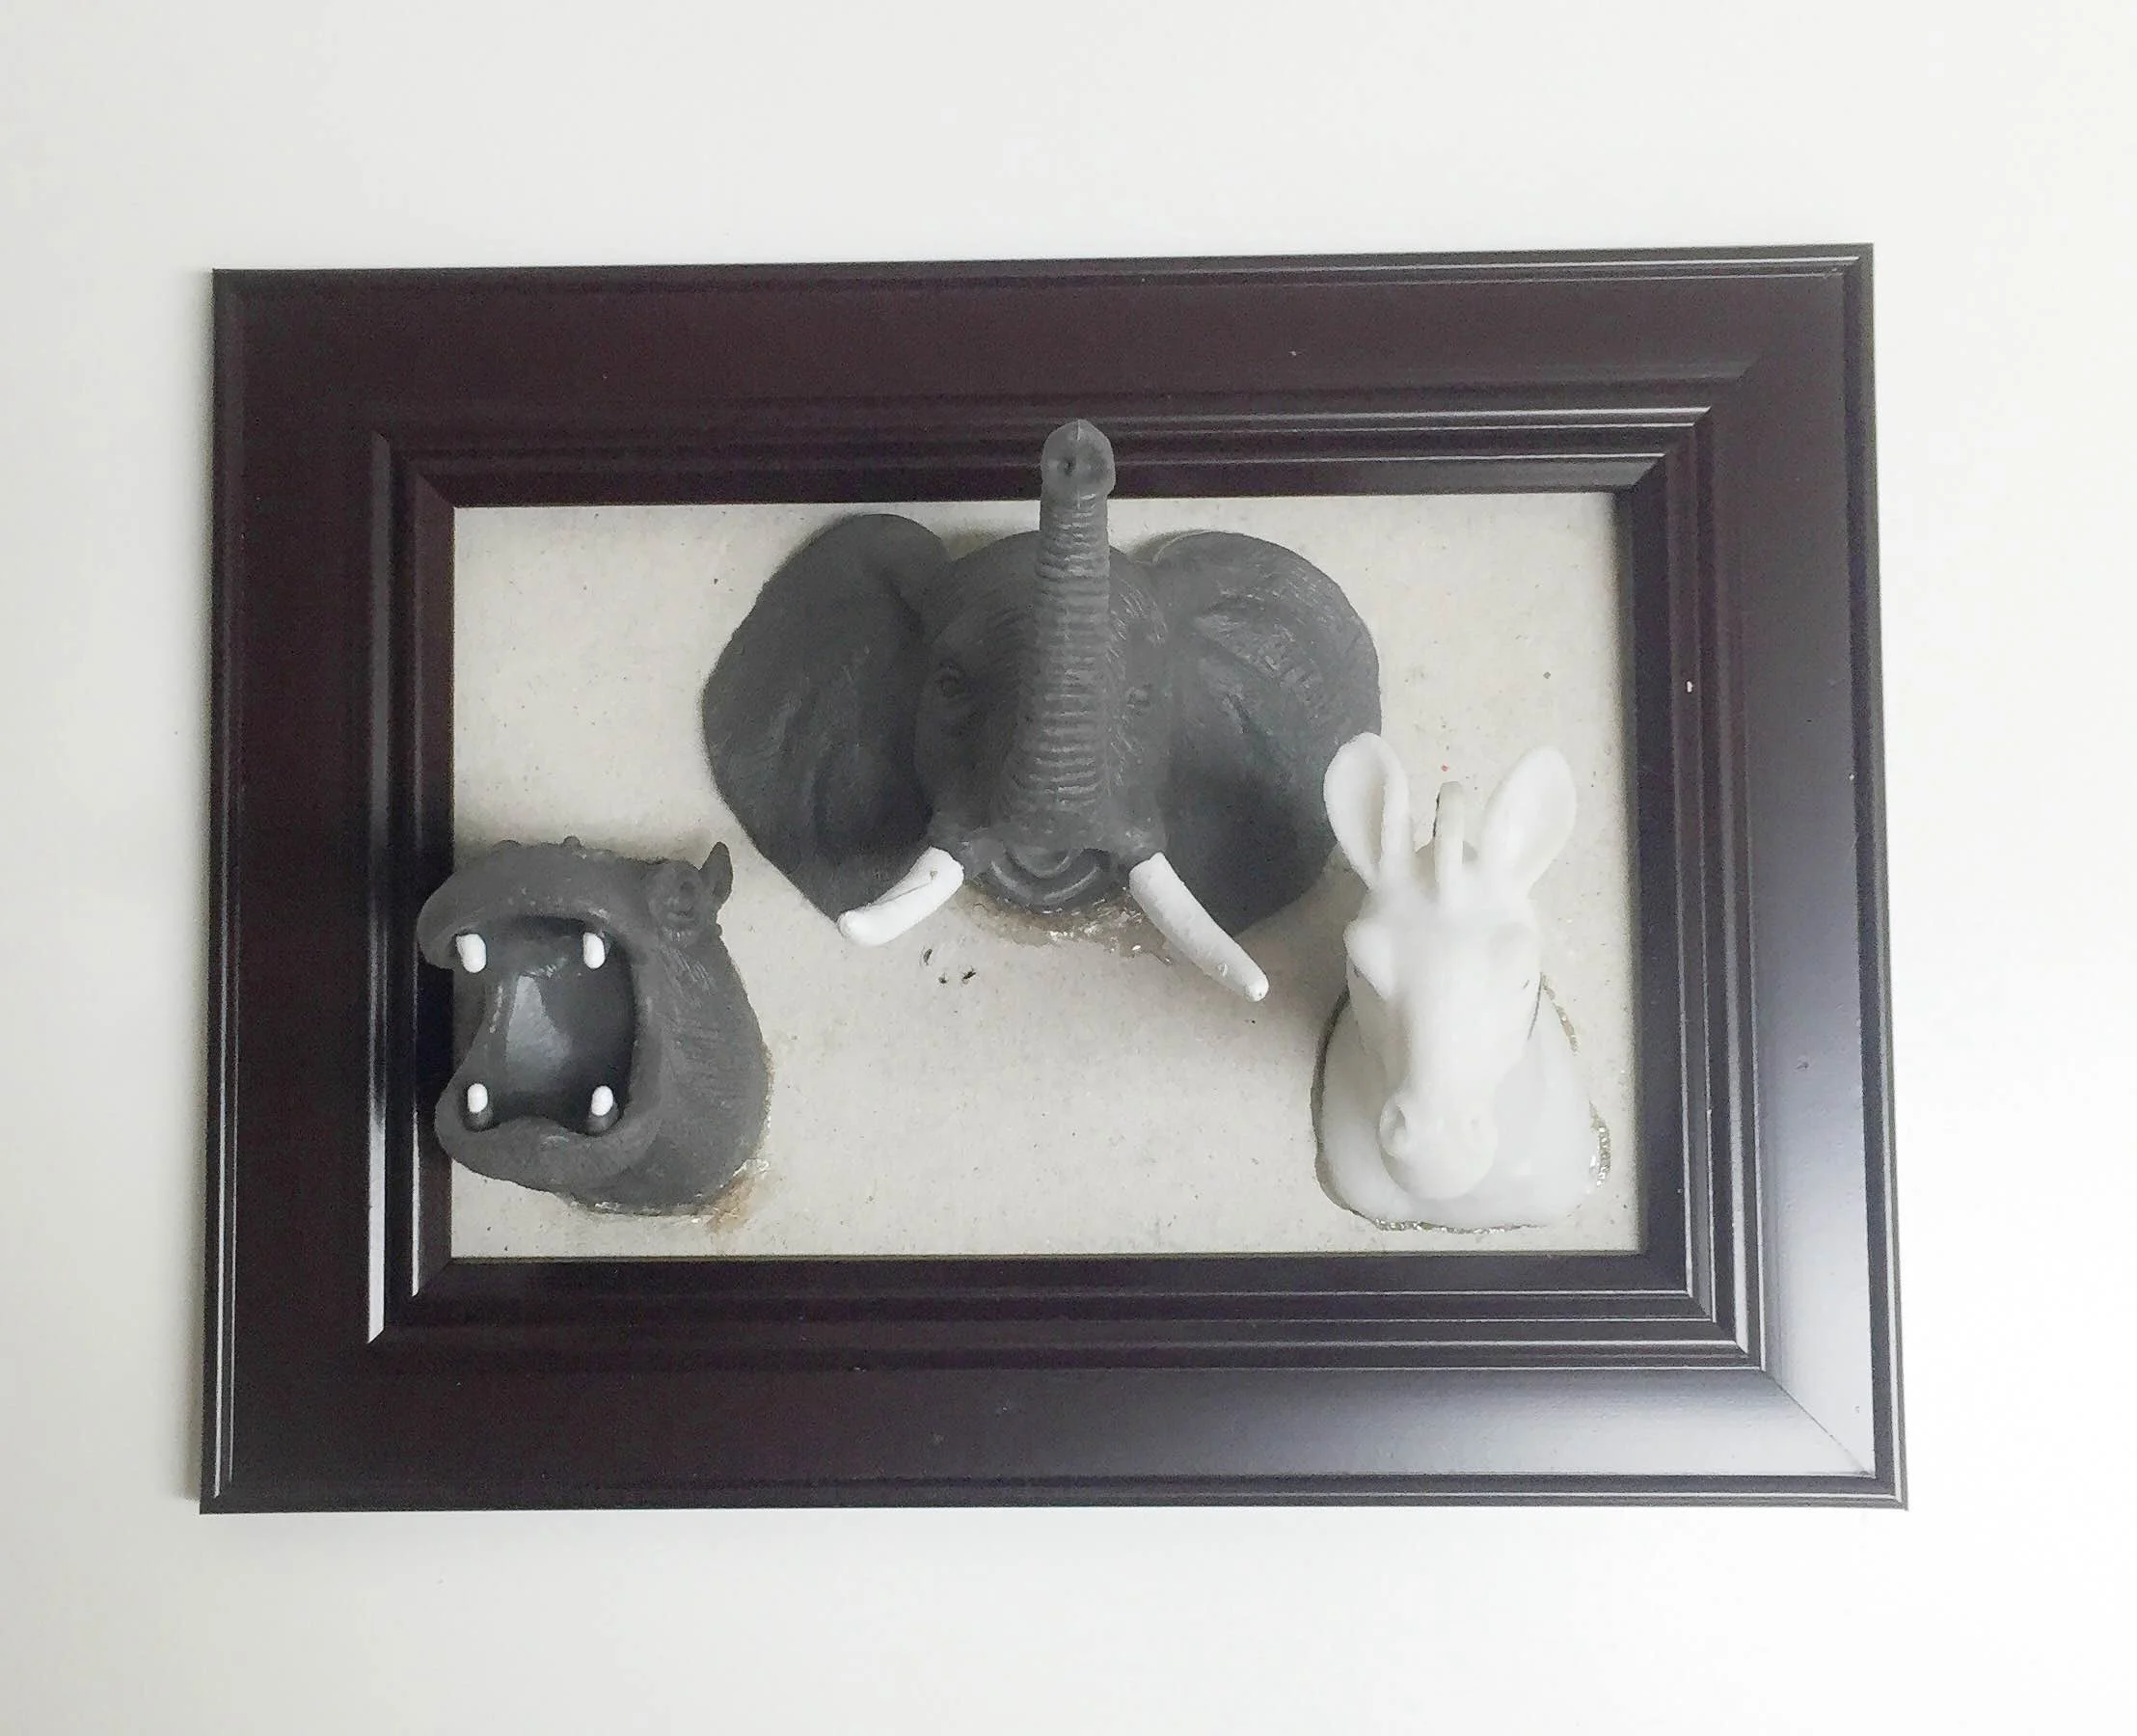
Step 5: Spray paint the entire piece. Let this dry for 25 minutes. Depending on how dark the animals are and how light the spray paint color is, you may need to do another coat of spray paint. If so, repeat and let it dry for another 25 minutes.
Step 6: Decide where you want to hang it (usually by the front door). Hammer the nail in the place you want to hang your key holder. Hang and voila!

You now have a cute key holder that you will always want to place your keys on and you will never lose your keys again!